Tag Archives: festive

A Christmas Wish List

11 Dec

CURRENTLY COVETING: FESTIVE FEVER

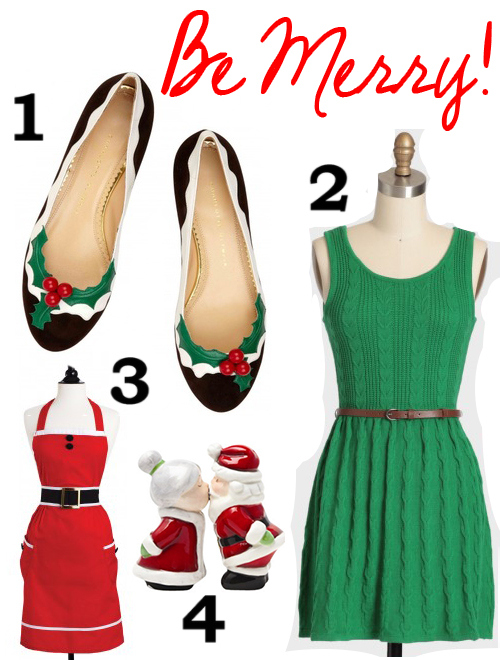
BE MERRY FESTIVE FUN

With a mere 2 weeks left until Christmas I thought it was about time I compiled a list of some of my favourite festive finds. What do you think, a cute enough list to get even the biggest Grinch smiling this Silly Season? Becky xo

1. Holly Shoes by Charlotte Olympia. 2. Green Knitted Dress by Ruche. 3. Mrs Claus Apron by Jesse Steele. 4. Kissing Mrs & Mrs Claus Salt and Pepper Shakers by Retro Planet.

Festive Treats

29 Nov

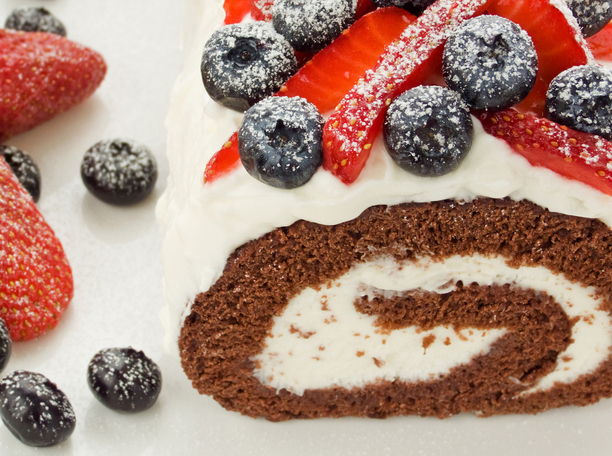
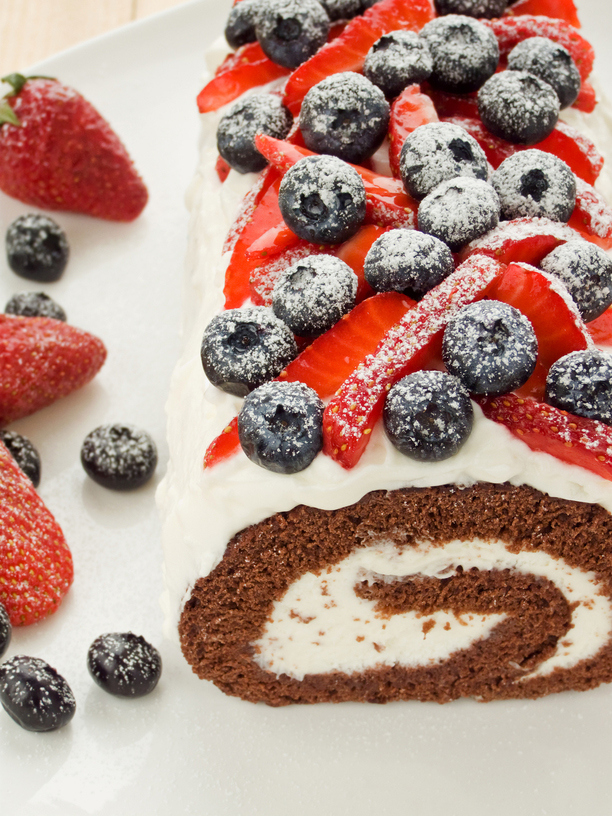
CREAM CHEESE BERRY ROULADE

This cream cheese berry roulade makes for a great festive dessert or snack and although it looks impressive is fairly easy to make.

What you will need:
4 tablespoons (fine) caster sugar
6 eggs, separated and at room temperature
1 teaspoon vanilla
2 tablespoons dutch cocoa
120 grams extra dark chocolate
300 grams cream cheese
1/4 cup icing sugar, sifted
1 teaspoon vanilla
Blueberries, strawberries and icing sugar for garnish.
What to do:
Preheat your oven to moderate and grease and line a shallow slice/lamington tray. Seperate your egg yolks and whites into 2 separate bowls and set aside. Melt your chocolate over a saucepan of boiling water and allow to cool slightly. Add the sugar and cocoa to the bowl containing the eggs yolks and beat using an electric beater until your mixture becomes light and fluffy. Now fold through your chocolate and vanilla. Using a clean set of beaters beat your egg whites until a stiff peak and gently fold into the chocolate mixture, being careful to not to over mix the batter. Pour your batter into your prepared tray and cook for around 15 minutes or until the sponge springs back when touched. Allow the sponge to cool before turning out onto a lightly icing sugar dusted board lined with grease proof paper. In a bowl beat together your cream cheese, vanilla and sifted icing sugar. Spoon half of your cream cheese mixture onto the top of the sponge and gently roll. Top your roll with the remaining cream cheese mixture, berries and a dusting of icing sugar.

Design Tutorials

28 Nov

DIY DIGITAL GREETING CARDS

Holiday season is fast approaching and that means it time to start designing and sending off this years greeting cards. As you probably know handmade cards make for the perfect sentimental gift, however when you have a heard of recipients and not a lot of time between preparing gifts, meals and other festivities aren’t always a feasible option. This is when digitally designed and professionally printed cards are the way to go. Contrary to popular belief you needn’t spend weeks designing and waiting for your cards to be printed. Companies like 24HourPrint can have your cards printed and on their way to your door within a 48 hour print process and offer free design templates for just about any editing software you can think of. In honour of greeting card season and in hopes of exposing other to the joys of design, I have decided to share with you a few tips for creating some great festive cards that your friends and relatives are sure to love. These tips are from a design point of view and can be easily transferred to suit any project you are working on, whether it be creating invitations, business cards and even flyers.

Set your goals- With any creative project you need to know what you want to achieve and when you want it done by. Yes your design, content and time frame may change as you continue through the design process but it’s important the set baseline goals to help yourself get started. I tend to find the initial concept the hardest to come by but once established things just seem to flow naturally.
Analysing your Audience- Determine who are designing for and what these people will enjoy and won’t. Yes, joker Uncle Bob will laugh his hat off at the half naked Santa stuck in the chimney but chances are Great Aunt Suzie will deem it offensive for a religious holiday. By looking at your audience you should be able to determine what sort of imagery, style and text is suitable and design accordingly.
Establish your budget- Huge, fully embossed pop-up cards will surely create an impact, but can you really afford the cost that it will take to have them printed and sent off?  There’s nothing worse than pouring your heart and soul into a project only to find you are grossly over budget and are forced back to the drawing board. If you want to create something super special do your research first and see if your little additions will meet your budget. With a bit a creatively and smart shopping your greeting cards don’t need to be extravagant or expensive to be special.
Set your theme- Do you want your cards to be cute, funny, traditional, religious or minimal? Once you have decided on the theme of your cards it’s a lot easier to find resources, decide on your colour scheme, layout and overall design.
Locate needed resources- There are loads of free and easy to access design resources on the net. Once you have decided on what your audience will enjoy and your theme you should have a pretty good idea about the content you want to include.  Finding fitting brushes, backgrounds and text should now be easy. Here are a few festive Photoshop brushes I love which you may find useful. All are free to download; Holiday Greeting text, Nightmare before Christmas Characters, Unique Christmas Trees, Snow Flakes and Traditional Christmas icons.
Start designing- When designing don’t forget to take into account the following;
- Boarders, bleed lines and folds
- The legibility of your text. Use a font that is clear and easy to read and a large enough size. The purpose of a greeting card is to send a message and incoherent text defeats the purpose of sending one at all.
- Your colour scheme. Does it allow text and imagery to be clear?
- The quality of images included. Ensure that any photographs are of  good quality so they don’t become pixelated or distorted when printed.
- Your personality! You needn’t stick to traditional colour schemes or layouts. Be creative and design something truly beautiful and unique to you. Festive cards needn’t be red and green and full of Santa Clauses and reindeer. Make your design personal; add a family photography, a picture of your pet in a Santa hat, a child’s drawing or your own personalised greeting, not something off Google.

So there you have a step by step guide to help get your started at designing your own greeting cards. Have fun and be sure to comment with any of your design tips and tricks. I’d love the hear them. Becky xo

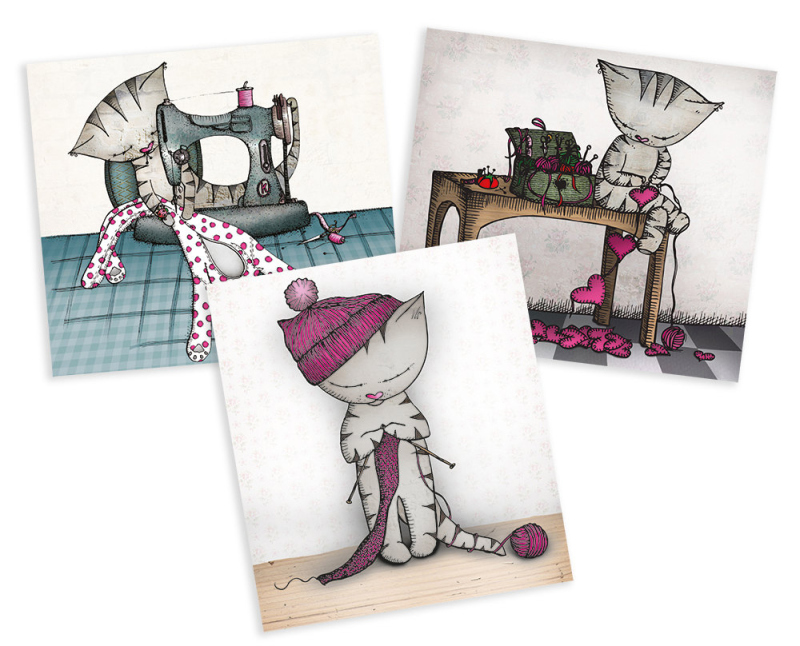
Image Sources: Illustrated Greeting cards designed by the lovely Ella Goodwin and available for purchase at Shop Miss Ella.

Festive Cooking

26 Nov

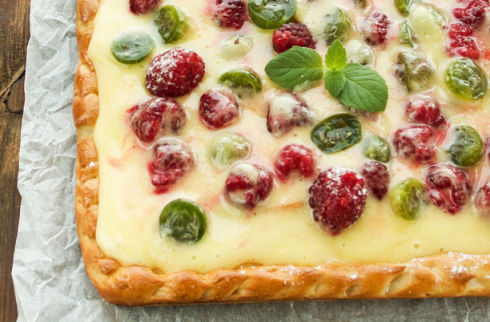
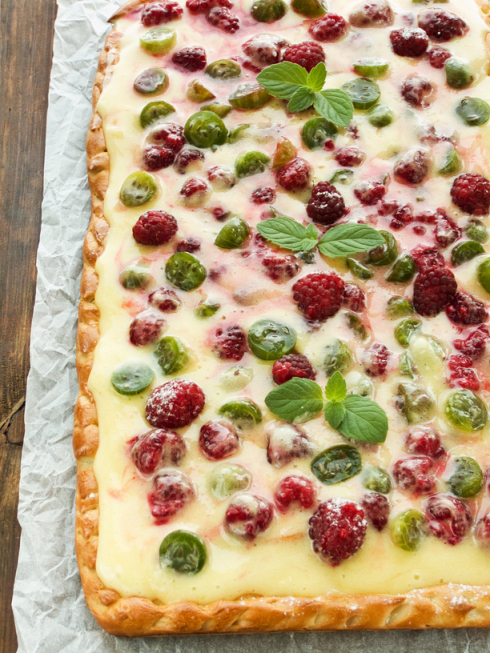
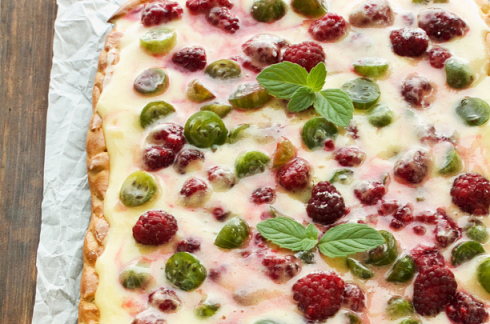
FESTIVE LEMON CURD BERRY TART

I have to admit I enjoy overindulging on festive treats at Christmas time more so than the actual gifts. After all Christmas is one of the only days of the year where you can enjoy that second slice of cheesecake without feeling guilty. Today I have decide to share with you something I have been working on; a lemon curd and berry tart which certainly is indulgent. I hope you enjoy it as much as I do (did!).

What you will need:
-1 large rectangular sheet of sweet pastry, you can use store bought or make your own. I made my own using this recipe.
- 4 tablespoons of butter
- The juice of 2 lemons
- 1 1/2 cups caster sugar (fine sugar)
- 4 eggs yolks at room temperature
-  2 teaspoons of finely grated lemon zest
- 2 cups of your favourite berries, I used raspberries and gooseberries (Green & Red!)
- Egg wash
- Mint for garnish (optional)
What to do:
Preheat your oven to moderate and grease and line a slice tray. Roll out your pastry into a large rectangle about 1 inch wider and longer than your tray. I like to place a sheet of grease proof paper over my dough then roll. This stops the dough from sticking to the rolling pins and also limits the amount of  additional flour you need, which can sometimes alter the taste and consistency of the pastry. Roll the sides of the dough inwards to create and border and a tart base the size of your tray. Use a fork to create a few small holes in the base of the dough, brush your dough (particularly your border) with the egg wash and bake for around 10-15 minutes or until just crisp. In the meantime start making your lemon curd. To do this beat together your egg yolks and sugar in a large bowl until the sugar has dissolved (it will no longer feel gritty). Add your sugar and yolks to a saucepan along with the butter, lemon juice and rind and cook on a low heat, whisking every so often until your mixture has thickened. Now remove your curd from the heat and pour into your tart base. Return your tart to the oven and bake for an additional 5-10 minutes or until the pastry is golden and the curd has stabilised. Remove  your tart from the oven and allow to cool before pushing your berries into the lemon curd. Garnish with a few sprigs of mint and a light dusting of icing sugar. Enjoy!

Perfect Pumpkin Spice Mix & Pumpkin Spice Latte

13 Sep

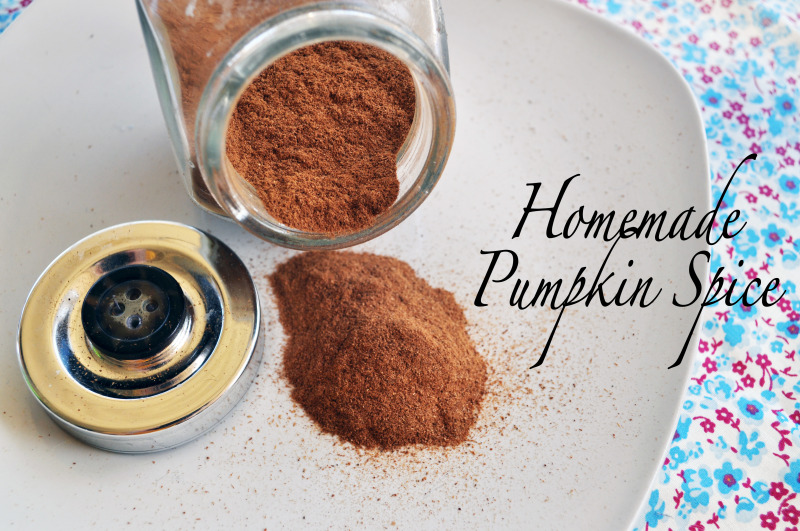
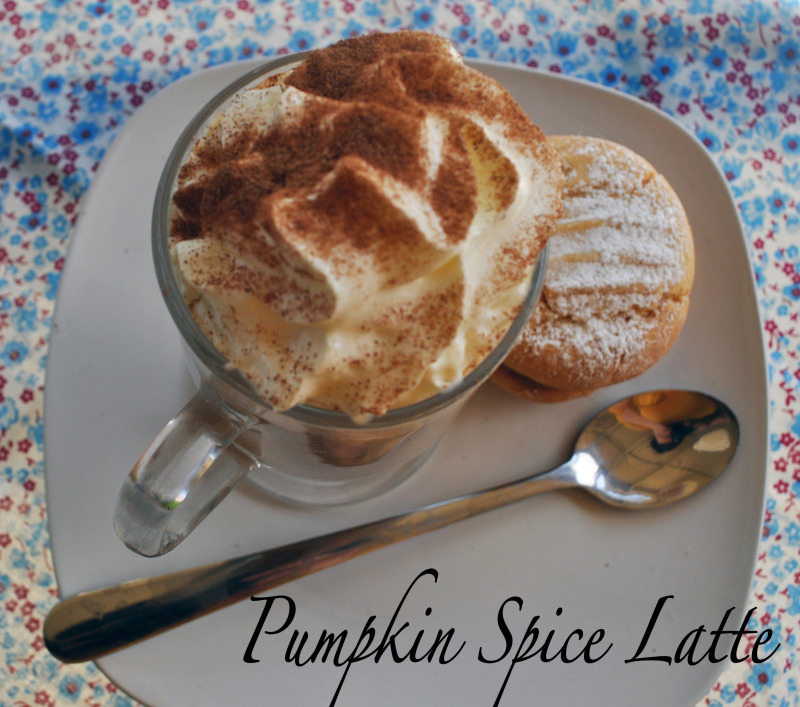
HOMEMADE PUMPKIN SPICE MIX & PUMPKIN SPICE LATTE

Here in Australia pumpkin spice isn’t really popular or even really heard of, or at least where I live it isn’t. As the season has changed I have been noticing a great deal of pumpkin spice recipes on Pinterest and on the blogs I follow. Everything from pumpkin spice pies to cupcakes has been seen popping up everywhere.  I was intrigued. What is pumpkin spice? What is it made of? How do you use it? After a bit of research I learned that pumpkin spice is basically a combination of ground herbs and spices that is often used alongside pureed pumpkin in baked foods and desserts. Wanting to give this culinary fad a go, I got creative in the kitchen and  after a lot of trial and error created some recipes for my own recipes for Pumpkin spice blend as well as a pumpkin spice latte. Tinned pumpkin puree or pumpkin spice mix isn’t available here in Australia or at the very least I was unable to find it anywhere so I had to make everything from scratch. I plan on using pumpkin puree in some recipes in the near future so to save time I boiled up a few kilos of pumpkin flesh, pureed it and froze it in a ice cube tray for future use to save time. Have fun trying these out and be sure to let me know what you think.
Pumpkin Spice Mix
I played around with the ratios a fair bit and this combination was my favourite. The flavour reminded me a bit of chai tea minus the tea of course.
Combine together;
  • 8 Parts of ground cinnamon
  • 4 Parts ground ginger
  • 1 Part ground nutmeg
  • 1 Part teaspoon ground cloves
  • 1 Part teaspoon ground cardamon

Pumpkin Spice Latte

2 cups of freshly brewed coffee
2.5 cups of milk
1/4 cup thickened cream
1/2  cup cooked butternut pumpkin, pureed
3 tablespoons brown sugar
3 Tablespoons Pumpkin Spice (See above recipe)
1 Teaspoon vanilla
Whipped cream for serving

Brew 2 cups of coffee to your liking. Instant or expresso kinds both work fine.
In a saucepan on a medium heat, warm the milk and cream/
All the pumpkin spice, vanilla and sugar.
Once heated whisk in the pumpkin puree.
Pour in the coffee and whisk until light and fluffy while on a low heat.
Alternatively if you are using an expresso machine use the milk frothier  to froth the mixture.
Serve with some whipped cream and a sprinkle of pumpkin spice.

Serves 4

Follow

Get every new post delivered to your Inbox.

Join 6,395 other followers