EVERYDAY HAPPENINGS

8 Jul

THE PAST WEEK IN PHOTOS 

BeerrrMeowYoghurtPappi

 ** WHAT’S BEEN HAPPENING?! **

Arrow

This week has been a super busy one full of back to work blues (I wish life was all holidays and cappuccinos), a lot of design work, study and catch ups with old friends. Amongst all that I decided, on a whim to redo my blog design. If you can’t tell already I love monochromatic themes and red is my favourite colour, so I thought it fitting to use it as my accent colour. What do you think? Too drab?  I also became reaquainted with my love of beer and became way too excited to learn that The Brisbane Beer Festival is happening soon. I am pretty sure I am more excited than any person should be about the prospects of trying a heap of different Bavarian beers! I have already bought my tickets (Thanks Groupon!) and can hardly wait.  I hope you all had a great week too! What are you looking forward to?

Arrow

Signnn

Spinach, Zucchini, Broccoli & Mushroom Quiche

8 Jul

SPINACH, ZUCCHINI, BROCCOLI & MUSHROOM QUICHE

** WHAT YOU WILL NEED **

- 1 small zucchini, diced
- 1 cup baby spinach
- 3 large mushrooms, sliced thinly
- 2 cups broccoli florets
- 1 tablespoon tomato paste
- 1 tablespoon minced chilli
- 1 tablespoon minced garlic
- Ground pepper to taste
- 4 eggs
- 1/4 cup milk
- 1/2 cup ricotta cheese spread
- 1.5 sheets short crust pastry
- Oil for frying
- Melted margarine or butter for glazing

** WHAT TO DO **

  1. Pre-heat your oven to Moderate and grease a round 30cm baking dish or tin.
  2. Line your greased dish with a sheet of pastry.
  3. Use the extra 1/2 sheet of pastry to cover any gaps, then roll the pastry edges over to create a crust.
  4. Lightly steam the broccoli until the stems are just tender.
  5. In a frypan with a small amount of oil, add your garlic, chilli and tomato paste.
  6. Stir until combined then add the zucchini, steamed broccoli and the mushrooms.
  7. Ensure all the vegetables are coated well with the garlic, chilli and tomato paste.
  8. Cool until the vegetables soften but not so much they become mush.
  9. Add in the spinach leaves at the last minute and cook until just wilted.
  10. Remove the vegetables from the heat and stir in the ricotta.
  11. In a bowl whisk together the eggs with the milk.
  12. Place the vegetables in bottom of the pastry lined dish and cover with the egg mixture.
  13. Season with the cracked pepper and add some grated cheese.
  14. Brush the pastry edges with the melted butter and cook in a moderate oven for around 25 minutes or until the egg sets.

If you notice the pastry becoming too brown while the egg still remains runny, cover the crust with foil and continue to cook. Serve hot or cold. This recipe serves around 6. Enjoy!

Signnn

Creating your own Textures in Photoshop

7 Jul

CUSTOMISING TEXT IN PHOTOSHOP USING YOUR CUSTOM PATTERNS

Create patterned text using photoshop patterns Creating your own custom made Photoshop patterns is a great skill to have. Especially if you are having trouble finding something particular online or don’t feel like paying for it. In this tutorial I will not only be showing you how to create and save your very own custom Photoshop patterns but how to use them to create patterned text. Like that seen in the image above.

** THE STEP BY STEP **

Arrow

1. CREATE YOUR TEXTURE

The first thing you need to do is create your texture. I decided to create a simple lipstick mark collage using these free photoshop brushes. To get started I created a new document with the following dimensions: 1500px by 1500px. I intended on using my pattern for large text (seen above) so used a very large canvas and larger graphics. If however, you intend to use your pattern for a smaller font you will need to create/use smaller more condensed graphics but can use a smaller canvas. Next up I rendered my background a slightly off white ( EDIT + FILL -> Select your chosen colour). Then using my Lipstick Brush Tool stamped across my canvas, switching the sizes, colours and positions of the brushes until I had my desired effect. I then flattened my image into one layer (LAYER + FLATTEN). 

2. SAVE YOUR TEXTURE

Now that you have your desired image you will need to save it as a texture. To do this simply click on the EDIT tab and select DEFINE PATTERN. You will then be prompted to name your pattern. Do so, click OK and you’re done! Now you have your very on custom made Photoshop texture ready to use.

3. ADD YOUR TEXTURE TO TEXT

On a new canvas or layer add your text using the HORIZONTAL TYPE TOOL. Resize and position your text until you have your desired effect. Now right click onto the text layer in the LAYERS TAB and select BLENDING OPTIONS. Check the box that says PATTERN OVERLAY. You can now select your pattern from the drop down box to the right. You can keep the other pattern overlay options at default or play around with them until you get your desired effect. Click OK once done. If you didn’t create a new canvas, rather a new layer simply turn off your background layer by unselecting the LAYER VISIBILITY icon. Now your text should fully rendered using your own custom made pattern and you’re free to play around with it’s position as well as various other text effects.

Arrow

I used CS6 to put together this tutorial. If you happen to have an earlier version you should be able to follow along fairly easily. Your interface however, may be arranged a little different to mine, so the location of certain tools may be differ. If you have any concerns just leave me a message below I’ll do my best to help.

Please note that this is a very basic method of creating a Photoshop Pattern. If you are looking to create something more professional, that can be tiled or stretched there’s a bit more work involved within the first step. I am willing to create such a tutorial if requested. Just let me know!

I hope you have enjoyed this tutorial and if you have any questions of requests feel free to comment below!
Signnn

Life Lessons

6 Jul

ARE YOU TAKEN ADVANTAGE OF?

HOW TO SAY “NO” & NOT FEEL GUILTY ABOUT IT

The only exception. Who could say "No" to this Cutie?

The only exception. Who could say “No” to this Cutie?

Saying “No” is something I have always struggled with. Whether it be a request for help from a fellow student with an assignment or for some free design work, having to say “No I can’t” is something I dread doing. No, (ha!) I don’t belief this distaste is due to an inept desire to be liked, rather a fear of disappointing or letting someone down that I care for or respect. You may be asking what is wrong with this?  Well, you’re probably right in thinking that wanting to help someone you care for is a great personality trait to have. But when you find yourself always putting the needs of others in front of your own things start to get stressful, resentment begins to bear it’s ugly head and you’re bound to be taken advantage of. My Mother likes to call me a “Big Hearted Sucker” especially when it comes to helping out my friends and little brother. I have spent many a night reformatting and editing assignments, creating last minute flyers (for free) and consequently have gone to work the following day on a few hours sleep and with a roaring headache. In some cases I have even been forced to reject a client due to insufficient time. All because I didn’t say “No” when I should have.

Although I still dislike doing it, saying “No” is something I have come to do when I need to. This wasn’t something I learnt overnight. Developing enough confidence and strategy in order to say what I want to has taken me most of my 23 years to be able to do without feeling guilty. Along the way I have learnt a lot, found out who my real friends are and developed more self-confidence. So what advice can I give you when it comes to saying “No”? Before you agree or disagree to a request always evaluate it and it’s authiticity. I like to do this by asking myself the following questions:

Arrow

BE SURE TO ASK YOURSELF:

- What is required of me and much of my time will be I need to give?

- Giving the amount of time required, am I going to be able to complete everything I need to do if I decide to help?

- Could this person complete such task without my help?

- Is there anyone or anything else that could help instead?

- If yes, why aren’t these people or services being utilised?

- Would the person/people do the same for me if the situation was reversed?

- Would I feel comfortable asking this person/people for their help?

Arrow

If you ask yourself these few and simple questions you should be able to decide whether to not you are able to assist, if the request is justified and most importantly if you are  just being taken advantage of.  As upsetting as it is a times, when you have a something other people covet, whether it be some sort of skill, money or thing there will always be people out there wanting to get to it through you. These people aren’t worth the time or hassle they bring and the sooner you learn this the happier you’ll be. When a person expects you to put your needs on the back burner to fulfil theirs and would not do the same for you they are not being fair. Always remember a good friend will never ask this of you and will always understand why you cannot help and not hold it against you. Someone taking advantage will not and will often try and guilt you into compliance. Which isn’t cool.

Saying “No” doesn’t come easy for a lot of us. I still find it a struggle that I have to actively deal with. However, becoming a goal orientated person has taught me that saying “No” when I have to is a necessary part of achieving what I want to. I have learnt that not being able to help everyone who asks me for help doesn’t make me mean or selfish, it makes me realistic and sensible. So next time you are met with a request you can’t fulfil do what’s best for you and say “No”. The more relaxed you will thank me.

Do you have trouble with saying “No” and being taken advantage of? If so how do you deal with it?
Signnn

Sweet Treats

5 Jul

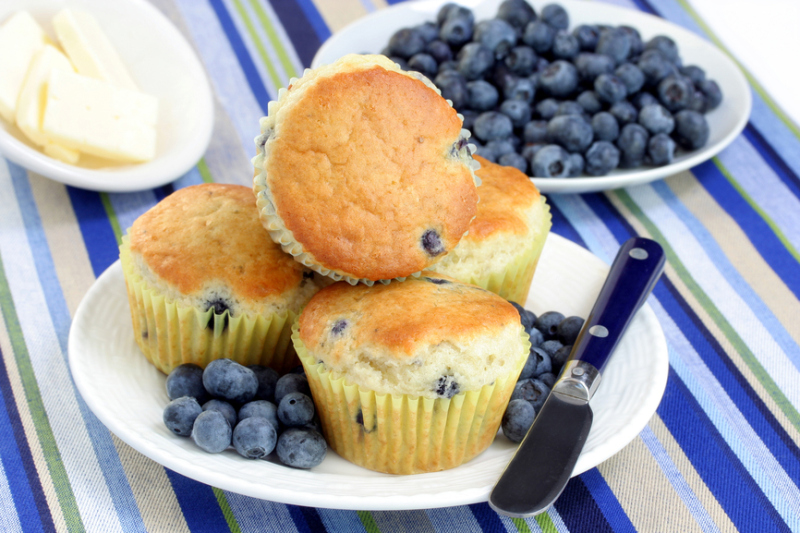
SUGAR FREE BLUEBERRY MUFFINS

Blueberry Muffins with Fresh Blueberries

It’s been a while since I have posted a food related post. To be honest I have been on a bit of a health kick lately so have been keeping my baking obsession on the back burner. However, after reaching my goal (3kg weight loss!) I decided to get back in the kitchen and whip up something a little naughty. After all everything in moderate is ok, right?  Plus these blueberry muffins are made using Splenda (artificial sugar) and skim milk so won’t ruin the diet all too much.

What you will need:

1/2 cup salt reduced margarine
1 cup Splenda
1 teaspoon vanilla
2 cups self raising flour
3/4 cup skim milk
2 eggs
1 teaspoon salt
1 cup blueberries, fresh or frozen

Blueberry Muffins

What to do:

Grease and line your muffin tray and pre-heat your oven to Moderate. In a large bowl beat together the margarine, Splenda and Vanilla until the mixture lightens and becomes less gritty. Add in the milk and mix until smooth using a wooden spoon. Gradually sift in the flour whilst continuing to stir. Stir in the salt and blueberries. Pour your mixture evenly into the muffin tray, Bake for around 20-30 minutes  or until a skewer comes out clean. I like to eat mine warm with a dab of margarine. Yum! Makes around 12 mid sized muffins.

Follow

Get every new post delivered to your Inbox.

Join 6,424 other followers