BASIC PHOTO ENHANCING IN PHOTOSHOP
I have decieded to share the method I use to touch up or enhance the photos you see here at Pixi Wishes & Forehead Kisses. In all honesty I don’t spend a lot of time editing my photos as I don’t have it. This is why I adopted this method/routine, which allows me to quickly and simply enhance the photographs I take. The final results are pretty subtle but when compared to the original images I believe the photos appear far more warm and appealing.
The Original Image:

Step 1: Open your image in Photoshop.
I use CS6 but any version of Photoshop will do. You may however find with earlier versions certain tools may be located in different positions compared to the screen shots below.
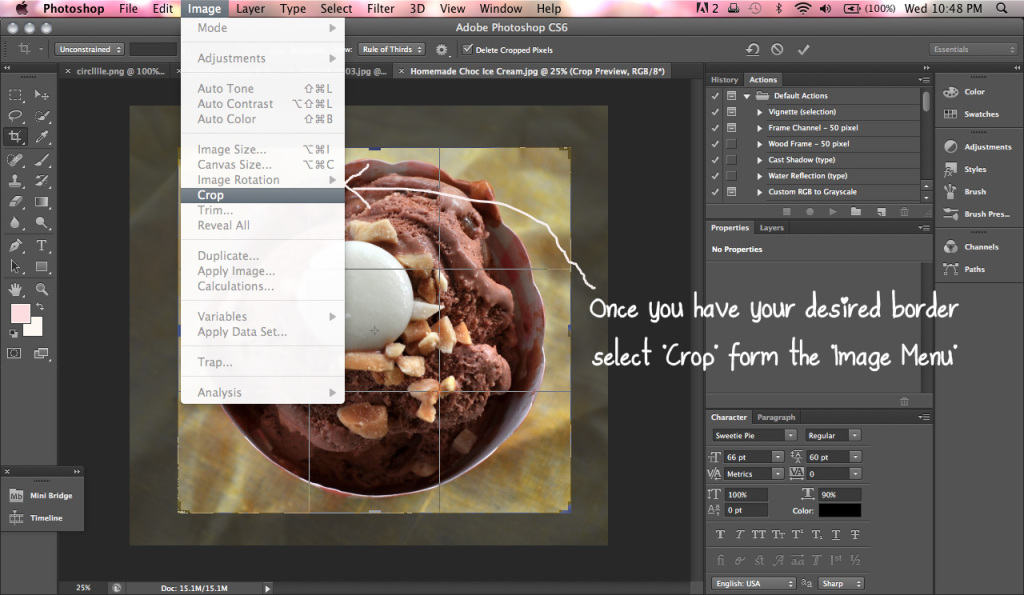
 Step 2: Using the Crop Tool Create a Crop Box around your image to frame it appropriately.
 3. Once your crop frame is properly aligned enforce the crop by selecting “Crop” from the “Image” tab.
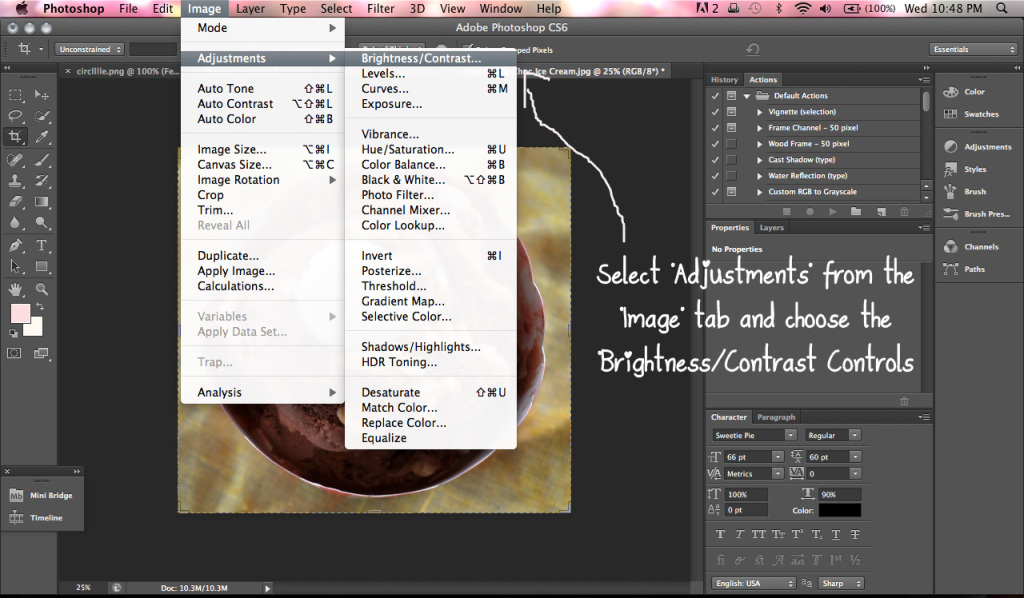
 4. Select the Brightness/Contrast Controls from the Image Tab.

5. Adjust the Brightness and Contrast levels until you reach your desired effect.
 6. Apply the Sharpen Filter to subtly enhance your image borders.
 And your done!
 So there you have it my quick and easy method of enhancing photos. If you have any questions or tips feel free to share them in the comments section.
Becky, K.
Tags: cropping, Design, editing, photoshop, tutorials


