
PROFESSIONAL COFFEE AT HOME

Those who know me understand that when it comes to coffee I take things seriously. There’s nothing I love more in the morning than a cup of freshly brewed coffee. Yes, I’m a shameless coffee snob. To me, a freshly brewed cup of Jo from the local cafe is far more delightful then some instant made at home. Having said this heading down to Starbucks every time the caffeine cravings hit isn’t always impractical and can work out to be a very expensive habit. This is when DIY Barista coffee is the way to go. Making your own freshly ground and brewed coffee at home may seem intimidating at first, but really isn’t that difficult. I will admit when I got my first expresso machine a few years ago, I was at a lost. I had no idea what to do and the whole process just seemed confusing. However, after a bit of practice and a lot of trial and error, I started to grasp things and now can whip up a great cup of coffee (at least to my liking) in a couple of minutes that I dare say reviles my local coffee house. To help get you on your way to making your own perfect cup I have decided to share a few things I have learnt along the way as a Home Barista. I hope you find them useful and feel free to comment with any of your tips or tricks!
1. Read your manual and get familiar with your machines parts and settings.
Before you rush off to the store to buy your beans or grinds it’s best to get to know the in’s and out’s of your expresso machine. Make sure you know how and where to pour in the water, where to attach your filter and what each of the settings do. If you find yourself confused consult your manual or better yet search Youtube for an instructional video. Most popular brands and models have instructional videos and/or reviews featured and are very helpful in learning how to use your machine.
2. Choose your beans or grinds
The range of coffee beans and grinds available is huge. You will most likely find yourself left wondering which brand, roast and flavour is best for you. If you are unfamiliar with types and brands I suggest purchasing small packs and trying them out one at a time or better yet going to your local coffee house and having them put together a sample pack. A sample pack will allow you to determine what type of coffee you like most, whether it be a milder roast or something more full flavoured and robust like a Java.
3. Get grinding (optional)
Whether you choose to buy pre-grounded coffee or do it yourself if up to you. Personally I switch between the two, depending on the amount of time and I have and what’s on special at the supermarket. Having said this, freshly ground coffee not only spreads a delightful aroma throughout the house, it has a more distinct and robust flavour. So if you have the time and money I suggest opting for the beans and grinding them yourself.
When grinding your beans be sure to use a quality grinder with sharp, dry blades. This will ensure you create an even texture that is fine enough for your particular coffee machine to filter water through. Most machines work best with grinds which are almost in a powdered form (expresso) but this will vary depending on your machine and the filtering time. Generally the longer it takes for the water to pass through the filter the courser your beans can be ground. When grinding I find for the most consistent texture it’s best to stop and start the grinder, like a blender. This sort of jolts the beans and insures those at the bottom and around the edges aren’t being missed by the blades.
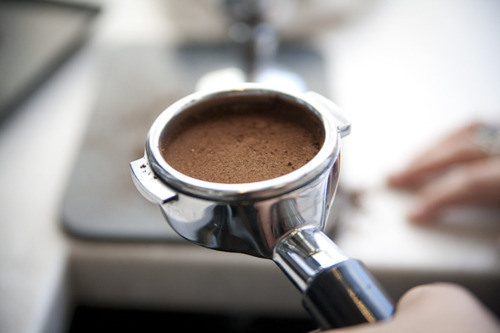
4. Push and Tap
This step may seem unimportant but I assure you it’s well worth the 10 seconds it takes. Once your have spooned your grinds into your filter its best to press them down as far as you can and tap the base of the filter on the bench. This removes any air and ensures the grinds are as compact as possible. By limiting the space and air between the grinds you force the water to make as much contact as possible, resulting in a stronger and more flavoursome brew.
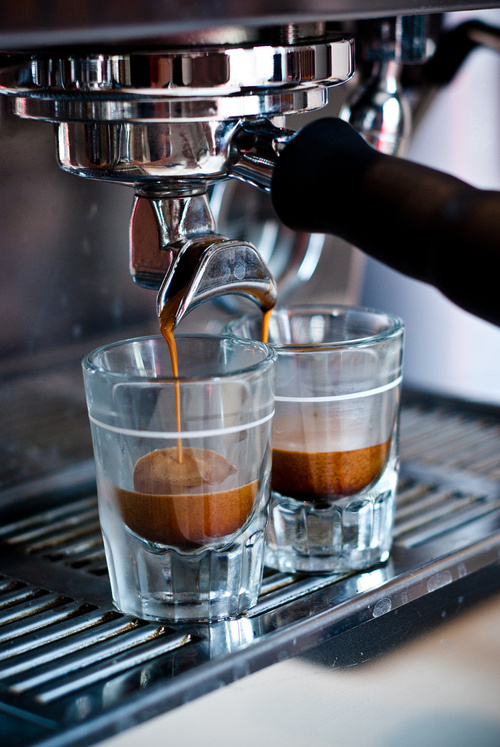
5. Filter slowly
If your machine has the option and time persists, filter your grinds as slow as possible. By allowing a longer contact time between your water and grinds a stronger and more flavoursome final product will result. Note: If you want a less intense flavour consider using a milder roast or a shorter filtering time.
6. Chill your milk
If like myself your enjoy the froth of a cappuccino almost as much as the actual coffee, I suggest chilling your milk prior to frothing. I usually pour my milk into the frothing mug and place it in the freezer while I am filtering and setting up the machine. Without getting all geeky and technical, chilling the milk prior to steaming affects the molecules in a way which ultimately results in more of that delicious froth. So if you want a plentiful layer of froth be sure to chill your milk prior to steaming!
7. Get Frothing/Steaming
I find it’s best not to fill your frothing mug more than 2/3 full when steaming/frothing. Depending on your machine fiddle around and find the best setting for your particular type of milk/technique. I like to all out and froth on the max setting while tilting the frothing mug to the side, allowing the steamer to just touch the top layer of my milk. This gives me the best result. This however, will vary depending on your particular machine. Frothing milk isn’t as easy as it looks, it took me a few goes to get it right. So don’t be discouraged if your first few attempts aren’t perfect or don’t even work at all. Practice makes perfect I assure you.
8. Know your ratios
Depending on your particular tastes, you will enjoy a certain ratio of coffee to milk. I find like most things it’s best to play around and experiment with varying ratios until you find one you like most. Please be aware that if you switch roasts or evens brands this ratio can and will most likely change.
9. Garnish, infuse and decorate
Be creative and experiment with different syrups, sugars (I love vanilla or cinnamon sugar in my coffee), garnishes and toppings. Have fun and don’t be afraid to try new things. You never know, on a whim an additional ingredient may be the beginning of a new favourite recipe.
10. Store your beans/grinds properly
There is a lot of controversy as to where it is best to store your coffee beans and grinds. Some people say the fridge or even freezer, others say this is a definite no-no. I personally like to store my beans and grinds in an airtight tin on my bench, away from the sun. I have never had any trouble with flavour loss or spoiling storing my coffee this way. If uncertain just follow what it says on the pack or ask at your place of purchase. Yes, storage advice does vary depending on brand and place of purchase. I wouldn’t recommend glass or a warm spot as you don’t want the beans to sweat. Coffee grinds and beans do have a fairly long shelf life but it’s best to consume them within a month of roasting to take advantage of their full flavour.
So there you have it it an extremely long post depicting how to make the perfect Barista Coffee at home. Becky xo
To few my other 101 posts click here.


love it! thanks for this xx
What kind of espresso machine do you have? We tried one recommended by a friend, but it was awful! I worked as a barista and I could not make anything good from that machine.
Great post!
Thanks Sarah, I have a Sunbeam Machine sorry I am unsure of the model because I got it about 2 years ago and it doesn’t say it on the machine. I however, don’t remember it being very expensive and I have never had any issues with it.
Sorry I can’t be of more help.
Becky
Yay! So good! I am an occasional coffee drinker but yes, I’m guilty of really loving Starbucks just the first time I tasted it. I even bought granulated beans from their shop to try brewing at home but I can’t imitate how they do their coffee! I will try this tips soon… I hope I can be a pro soon… Thanks sweetie #GIG
I have a Keurig and my husband is convinced that buying me an espresso machine will lead to my untimely death- LOL. I am already a complete coffee addict and, like you, a coffee snob.
I may have to send him a link to your pretty photos to get him on board with getting one! Great tips- bookmarking this one for when he finally gives in.
http://veggiesandglitter.com