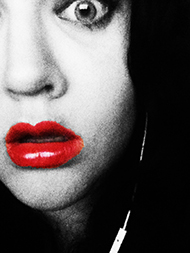
CUSTOMISING TEXT IN PHOTOSHOP USING YOUR CUSTOM PATTERNS
 Creating your own custom made Photoshop patterns is a great skill to have. Especially if you are having trouble finding something particular online or don’t feel like paying for it. In this tutorial I will not only be showing you how to create and save your very own custom Photoshop patterns but how to use them to create patterned text. Like that seen in the image above.
** THE STEP BY STEP **
1. CREATE YOUR TEXTURE
The first thing you need to do is create your texture. I decided to create a simple lipstick mark collage using these free photoshop brushes. To get started I created a new document with the following dimensions: 1500px by 1500px. I intended on using my pattern for large text (seen above) so used a very large canvas and larger graphics. If however, you intend to use your pattern for a smaller font you will need to create/use smaller more condensed graphics but can use a smaller canvas. Next up I rendered my background a slightly off white ( EDIT + FILL -> Select your chosen colour). Then using my Lipstick Brush Tool stamped across my canvas, switching the sizes, colours and positions of the brushes until I had my desired effect. I then flattened my image into one layer (LAYER + FLATTEN).
2. SAVE YOUR TEXTURE
Now that you have your desired image you will need to save it as a texture. To do this simply click on the EDIT tab and select DEFINE PATTERN. You will then be prompted to name your pattern. Do so, click OK and you’re done! Now you have your very on custom made Photoshop texture ready to use.
3. ADD YOUR TEXTURE TO TEXT
On a new canvas or layer add your text using the HORIZONTAL TYPE TOOL. Resize and position your text until you have your desired effect. Now right click onto the text layer in the LAYERS TAB and select BLENDING OPTIONS. Check the box that says PATTERN OVERLAY. You can now select your pattern from the drop down box to the right. You can keep the other pattern overlay options at default or play around with them until you get your desired effect. Click OK once done. If you didn’t create a new canvas, rather a new layer simply turn off your background layer by unselecting the LAYER VISIBILITY icon. Now your text should fully rendered using your own custom made pattern and you’re free to play around with it’s position as well as various other text effects.
I used CS6 to put together this tutorial. If you happen to have an earlier version you should be able to follow along fairly easily. Your interface however, may be arranged a little different to mine, so the location of certain tools may be differ. If you have any concerns just leave me a message below I’ll do my best to help.
Please note that this is a very basic method of creating a Photoshop Pattern. If you are looking to create something more professional, that can be tiled or stretched there’s a bit more work involved within the first step. I am willing to create such a tutorial if requested. Just let me know!
I hope you have enjoyed this tutorial and if you have any questions of requests feel free to comment below!


Great post! I neeeeeed to learn how to use Photoshop - I bought it and never even tried to learn how to use it.
Love it!!! Thanks for sharing it
xoxo
novelstyle.blogspot.com
When I get some money saved up, I am DEFINITELY purchasing PhotoShop. My dad is a graphic designer who has sworn by the program for years. Thanks for the tips; they will come in handy for all of us bloggers out there trying to make our sites look better.
http://veggiesandglitter.com
This is great as usual - I’m learning a lot!
This sounds like advanced Photoshop, thanks for the tips I just know the basics.
ahh i need to learn photoshop!!!
Loved it totally. I used to be a complete Photoshop junkie during my school days. But I’ve forgot most of the things stuffs. Hehe your post gave me a quick recap!
Love love this post! Thanks so much for sharing
Great post xx
Great post! I definitely could learn a thing or two about Photoshop!
Nice tutorial! I love Photoshop but I rarely use textures on text.
Love Textures and I normally get inspiration via Brusheezy Thanks for the tut hun
P.S. loving the new look of your site <3
Thanks for this one Im currently studying photoshop :_)
Photoshop for me feels like some program coming from another planet…but you are so good at giving easy tutoriallll…..thank youuuu
Yayy! Thank you for this post, Becky!! x
Photoshop is my favorite program ever. I’ve started using it at university and can’t stop
awesome post!! i have no idea to how to use photoshop!! lol, can ya believe it???
ohhhh love this!! I have been looking into doing something similar!@ thanks for sharing!
xo,
Dee Trillo
http://HauteFrugalista.com