Tutorial: Creating Creases and folds in Photoshop

28 Jul

ADDING CREASES TO AN IMAGE IN PHOTOSHOP

Creating creases and folds on a image using Photoshop is a great way to add a vintage feel to your photographs. Creating these folds and creases in relatively easy and can be done in around 30 minutes by following my easy tutorial.  To view the full tutorial Click Here.
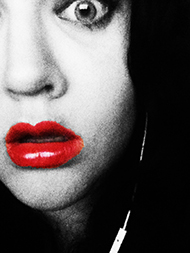
The Original Image…

The Final Effect…

About these ads

2 Responses to “Tutorial: Creating Creases and folds in Photoshop”

  1. nonoymanga July 28, 2012 at 2:39 am #

    Nice framing!!! Cheers Nonoy Manga

Your 2 cents!

Fill in your details below or click an icon to log in:

WordPress.com Logo

You are commenting using your WordPress.com account. Log Out / Change )

Twitter picture

You are commenting using your Twitter account. Log Out / Change )

Facebook photo

You are commenting using your Facebook account. Log Out / Change )

Google+ photo

You are commenting using your Google+ account. Log Out / Change )

Connecting to %s

Follow

Get every new post delivered to your Inbox.

Join 6,395 other followers

%d bloggers like this: